|
Technical
Information For Fauser Security
Windows and Doors
Window
and Door Configuration
Security Glazing
Awnings
Measuring
and Installing Windows
Click
on Photo For Larger View.
|
|
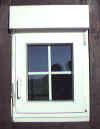 Measuring
the Window: Measure only the rough opening. Take a measurement each
at
the top and at the bottom and at the left and right side. Take the smaller
of the measurements. At the factory, we will deduct 3/8" on each
side of the window for the final window size. This will guarantee
the
proper spacing and allow for adjustments. At that time you will have
to make a decision: How are you going to trim the window out? Flush
on the
inside or outside or somewhere in between? There are many snap-on profiles
which make this task easy and efficient.Contact us at that time, send
us a section drawing of the opening, indicating where in the frame you
would like to position the window and how you would prefer to trim
it
out. We then will provide you with drawings of different possible installation
profiles for you to choose from. The same goes for the door position. Measuring
the Window: Measure only the rough opening. Take a measurement each
at
the top and at the bottom and at the left and right side. Take the smaller
of the measurements. At the factory, we will deduct 3/8" on each
side of the window for the final window size. This will guarantee
the
proper spacing and allow for adjustments. At that time you will have
to make a decision: How are you going to trim the window out? Flush
on the
inside or outside or somewhere in between? There are many snap-on profiles
which make this task easy and efficient.Contact us at that time, send
us a section drawing of the opening, indicating where in the frame you
would like to position the window and how you would prefer to trim
it
out. We then will provide you with drawings of different possible installation
profiles for you to choose from. The same goes for the door position.
|
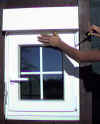 The
windows will arrive without the handle attached. Take the handle
and
stick it into the opening,making sure that you can turn it into the
three positions (closed/tilt/turn), then fasten with two supplied
screws.
Put the handle in the open or turn position (picture) and while holding
the window in place, take a screw driver and push the safety latch
on
the top hinge in and down. This will release the top hinge and allows
you to tilt the window towards you. Then lift the window out of
the
bottom hinge. The bottom hinge is tiltable. You are now ready to put
the frame into the rough opening.HINT:Remove
all window panels before installation. It makes for a safer and
easier
installation. Carry large doors and fixed windows with piano straps! The
windows will arrive without the handle attached. Take the handle
and
stick it into the opening,making sure that you can turn it into the
three positions (closed/tilt/turn), then fasten with two supplied
screws.
Put the handle in the open or turn position (picture) and while holding
the window in place, take a screw driver and push the safety latch
on
the top hinge in and down. This will release the top hinge and allows
you to tilt the window towards you. Then lift the window out of
the
bottom hinge. The bottom hinge is tiltable. You are now ready to put
the frame into the rough opening.HINT:Remove
all window panels before installation. It makes for a safer and
easier
installation. Carry large doors and fixed windows with piano straps!
|
|
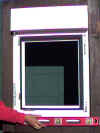 Once
the window is inside the rough opening, position it according to plan
(flush with siding/set-back e.g.). Using an appropriate spirit level,
check the sill for level and shim beneath each jamb leg as needed.
If
the window is unusually wide, shim the sill midway between legs, as well.
Check the sill frequently throughout the installation to ensure that
it
has not shifted out of position. Check for equal spacing on the left
and right side of jamb. With appropriate drill bit, drill through
the pre-drilled
hole in the left lower corner of the frame, into the substrate. Take
a supplied screw and fasten this corner.HINT:The
supplied screws are made of hardened steel. They work in wood, brick
and concrete. For wood and brick use a 6 mm bit, for concrete use 6.5mm
(shipped with order). Once
the window is inside the rough opening, position it according to plan
(flush with siding/set-back e.g.). Using an appropriate spirit level,
check the sill for level and shim beneath each jamb leg as needed.
If
the window is unusually wide, shim the sill midway between legs, as well.
Check the sill frequently throughout the installation to ensure that
it
has not shifted out of position. Check for equal spacing on the left
and right side of jamb. With appropriate drill bit, drill through
the pre-drilled
hole in the left lower corner of the frame, into the substrate. Take
a supplied screw and fasten this corner.HINT:The
supplied screws are made of hardened steel. They work in wood, brick
and concrete. For wood and brick use a 6 mm bit, for concrete use 6.5mm
(shipped with order).
|
|
 Using
an appropriate spirit level, check the window for plumb and square.
If
necessary, adjust either by slipping shims between the jamb and the framing.
When the window is straight, pre-drill and fasten upper left corner.
Next
fasten the lower and upper right side of the window. If you have to adjust
or move the window, back out the screw until it clears the stud, adjust
the window and screw it back in. The screw should be flush with the surface
of the frame. Not too deep and not protruding. These are continuous
threaded
screws which make this process simple. Fill space between rough opening
and window with good quality Polyurethane Foam. All of the pictures
above
and below show a built-in Rolling Shutter. Disregard if not applicable. Using
an appropriate spirit level, check the window for plumb and square.
If
necessary, adjust either by slipping shims between the jamb and the framing.
When the window is straight, pre-drill and fasten upper left corner.
Next
fasten the lower and upper right side of the window. If you have to adjust
or move the window, back out the screw until it clears the stud, adjust
the window and screw it back in. The screw should be flush with the surface
of the frame. Not too deep and not protruding. These are continuous
threaded
screws which make this process simple. Fill space between rough opening
and window with good quality Polyurethane Foam. All of the pictures
above
and below show a built-in Rolling Shutter. Disregard if not applicable.
|
|
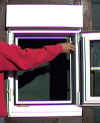 Using
the supplied hex key, you are now ready to adjust the window. On the inside,
upper corner you find an adjustment screw for the left and right movement
as well as up and down movement of the window. The lower and outside hinge
is where you adjust the window up and down as well as left and right.The
seal pressure can be adjusted with the locking pins on the handle side
of the frame. These pins have a cam-action sleeve which will apply more
or less pressure on the seals. All settings are factory set and should
not have to be adjusted under normal circumstances. The seal pressure
adjustment is for an adjustment years down the road if the seals should
compact over the years. Using
the supplied hex key, you are now ready to adjust the window. On the inside,
upper corner you find an adjustment screw for the left and right movement
as well as up and down movement of the window. The lower and outside hinge
is where you adjust the window up and down as well as left and right.The
seal pressure can be adjusted with the locking pins on the handle side
of the frame. These pins have a cam-action sleeve which will apply more
or less pressure on the seals. All settings are factory set and should
not have to be adjusted under normal circumstances. The seal pressure
adjustment is for an adjustment years down the road if the seals should
compact over the years.
|
|
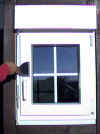 If the frame needs to be adjusted more then the
adjustment screws can accomplish, you will have to remove the snap-on
glass stops which keep the glazing in place. Take a sharp 4" spatula
and pry the profile loose. Start with the longest side first.
In reverse, take the shortest profile first, hand press it into the frame
and complete the insertion with the tapping of a Plastic or Rubber Hammer!
HINT:Should you ever scratch the vinyl frame,
you can sand the scratches out with 180 sandpaper, continue with finer
paper 600 and finish with a polishing paste. The frame will be like new
again.
|
|
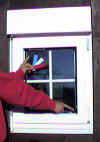 Each
glazing panel is held in place by plastic spacers, two each in the upper
left corner and on the lower hinge side. Since the glazing panel holds
the frame in place, any rough up and down adjustment can be made with
adding or subtracting spacers on the top and bottom.If the frame needs
to come down you will have to take a spacer out and add it to the lower
corner. If the frame needs to go up, you add a spacer on top and take
one out of the lower corner. You will have to use a lever in order to
create enough space to slip a spacer in. Never use
any metal or other hardened material against the glazing! It will
crack the glass panels! Only use plastic or wood!
HINT:The aluminum spacer bar contains all possible information
about: date of manufacturing (warranty), size of glass in mm, security
level of glass and type of lowE coating. Each
glazing panel is held in place by plastic spacers, two each in the upper
left corner and on the lower hinge side. Since the glazing panel holds
the frame in place, any rough up and down adjustment can be made with
adding or subtracting spacers on the top and bottom.If the frame needs
to come down you will have to take a spacer out and add it to the lower
corner. If the frame needs to go up, you add a spacer on top and take
one out of the lower corner. You will have to use a lever in order to
create enough space to slip a spacer in. Never use
any metal or other hardened material against the glazing! It will
crack the glass panels! Only use plastic or wood!
HINT:The aluminum spacer bar contains all possible information
about: date of manufacturing (warranty), size of glass in mm, security
level of glass and type of lowE coating.
|
The above installation outline is only a rough
description of the process. But with the purchase of Fauser windows
you also get our full consumer service package, including: Any form
of help needed in choosing your window, help with deciding how to
mount
and trim-out the windows and finally all the advice needed in
order to guarantee a successful installation. We are available per
fax, telephone and e-mail. With larger projects, we can send a factory
trained
installer to oversee the installation and guarantee the installation.
FAUSER windows and doors are like a finely tuned machine. The better
you level and plumb the frame during installation, the better the windows
and doors will perform!
|
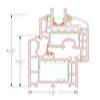 Dimensions Dimensions
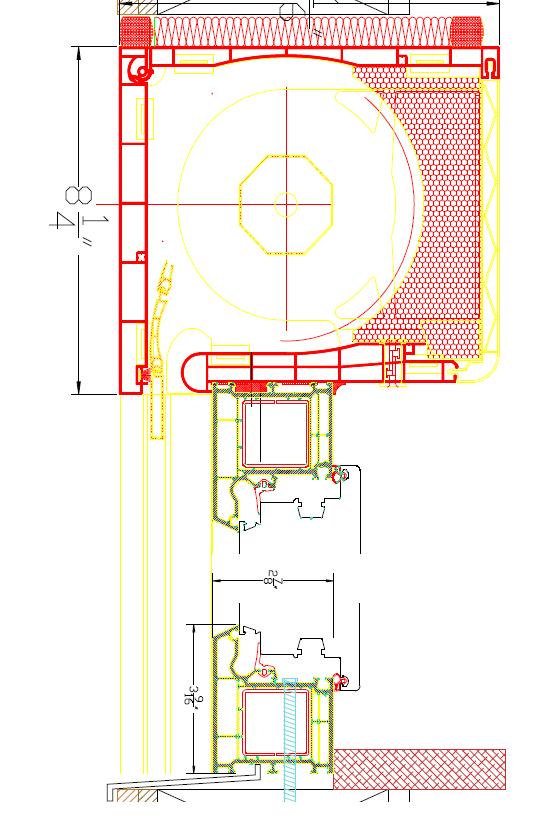 Sample installation
 |
top
|


